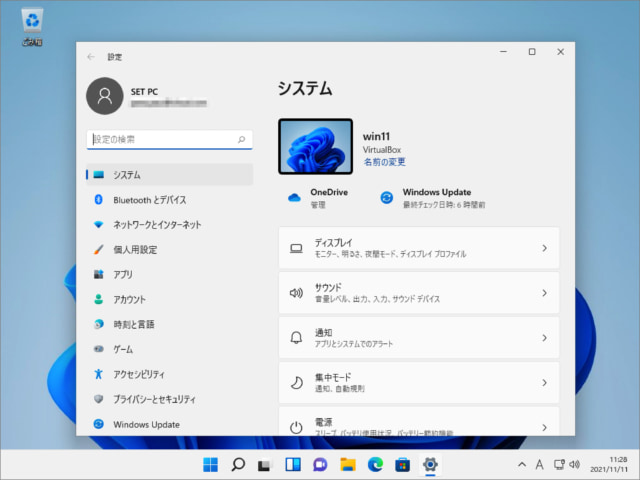
Windows 11には「Windowsの設定(設定)」を起動する方法がいくつか用意されているので、ここではその方法をみていきます。
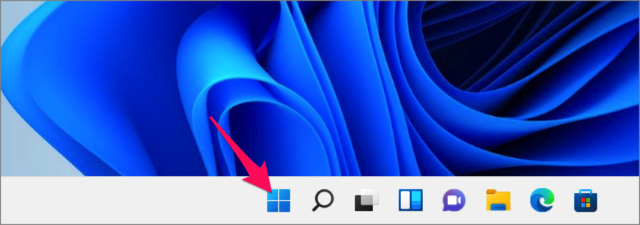
スタートメニュー(ピン留め)
タスクバーの「Windowsロゴ」をクリックし スタートメニューにピン留めされた「設定」を起動します。
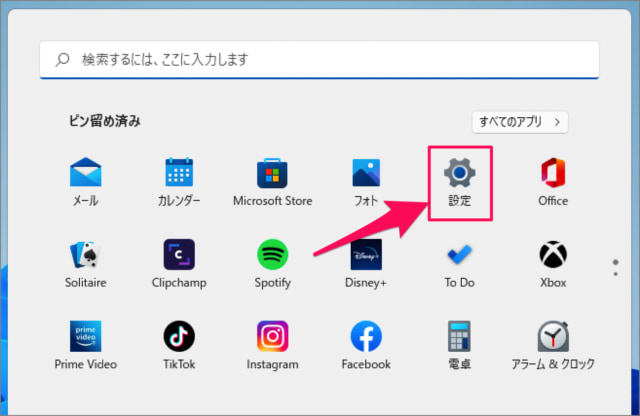
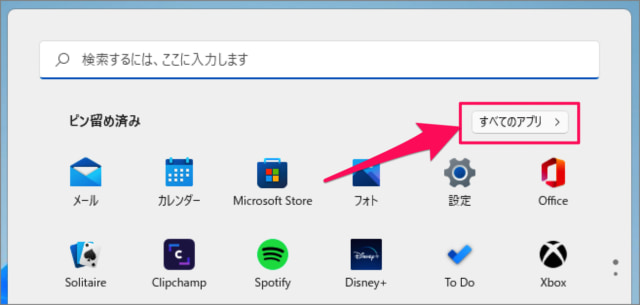
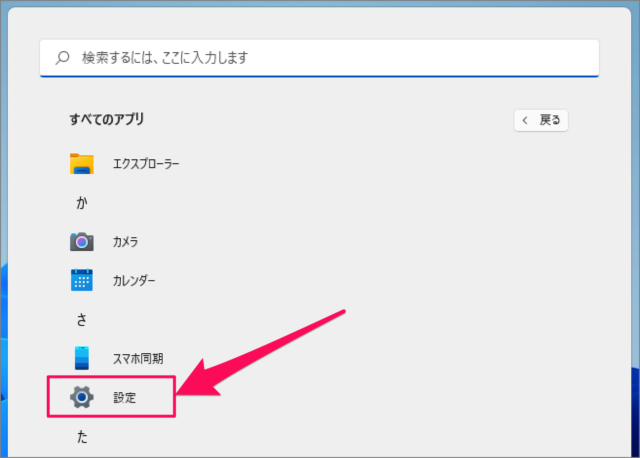
スタートメニュー(すべてのアプリ)
タスクバーの「Windowsロゴ」をクリックし 「すべてのアプリ」をクリックし すべてのアプリから「設定」を起動します。
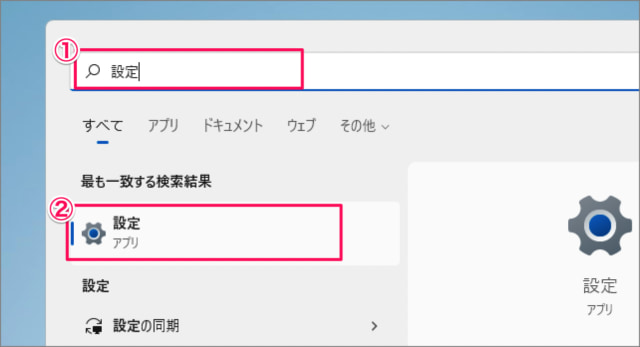
スタートメニュー(検索)
タスクバーの「検索」アイコンをクリックします。 ①検索フォームに「設定」と入力し②「設定」を起動します。
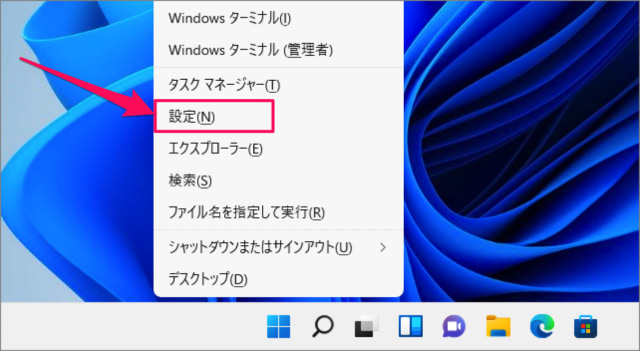
クイックアクセスメニュー
「Windowsロゴ」を右クリックし 「設定」をクリックします。
ショートカットキー「Win + i」
ショートカットキー「Win + i」を押すと、「設定」が起動します。 ※ 「Windows」キーを押しながら、「i」キーを押します。
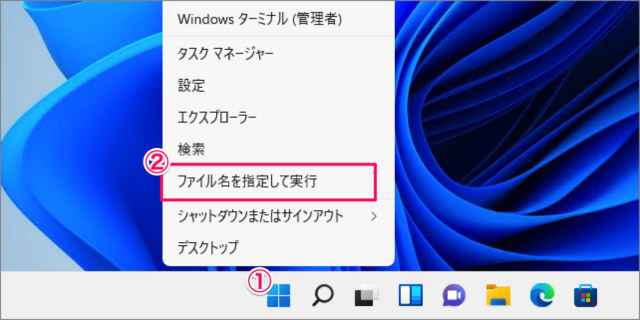
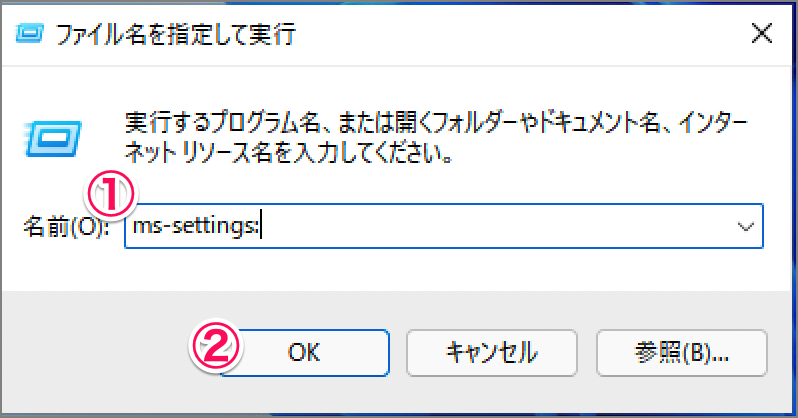
ファイル名を指定して実行
①「Windowsロゴ」を右クリックし②「ファイル名を指定して実行」をクリックします。 ファイル名指定して実行です。①名前に「ms-settings:」と入力し②「OK」をクリックします。
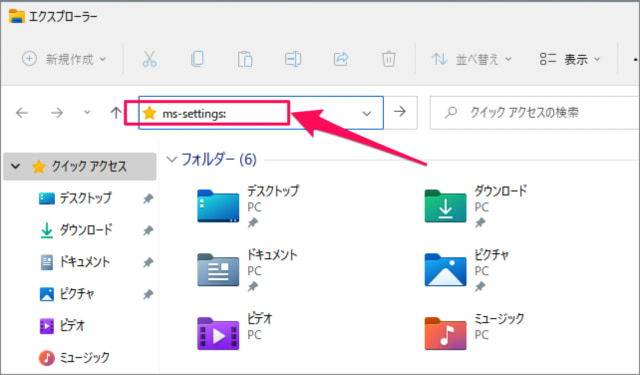
エクスプローラー
エクスプローラーを起動し上部フォームに「ms-settings:」と入力し、Enterキーを押しましょう。
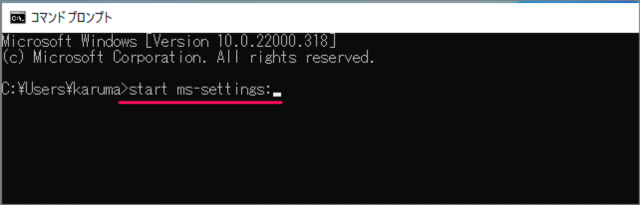
コマンドプロンプト
コマンドプロンプトを起動し「start ms-settings:」と入力し、Enterキーを押しましょう。 これで Windows 11 「Windowsの設定」を起動する方法の解説は終了です。 その他の Windows 11 の設定と使い方をまとめていますので、ご参考にどうぞ。
Windows 11 の設定と使い方まとめ
関連リソース